Implementation Guide
Prerendering for Next.js: Setup Guide
Production prerendering for Next.js App Router: bot detection middleware, reverse proxy routing, WAF whitelist, validation.

Article
Implementing prerendering for a Next.js application requires four components: bot detection middleware, reverse proxy routing, WAF whitelist configuration, and snapshot validation. This guide covers all four with production-ready code for Next.js App Router (v13+) and ostr.io as the prerendering service.
ostr.io is a managed prerendering service that delivers deterministic HTML snapshots to search crawlers and AI retrieval systems through proxy-level middleware, without requiring framework rewrites. The middleware patterns below work with any prerendering service; ostr.io-specific configuration is noted where applicable.
Simple Integration: The seo-middleware-nextjs NPM Package
Before wiring bot detection by hand, consider the official NPM package: seo-middleware-nextjs. It is a lightweight Next.js middleware powered by the ostr.io pre-rendering engine, paired with a global CDN and smart caching layer. The package intercepts crawler and social-bot requests at the edge and reroutes them to ostr.io rendering endpoints — fully rendered HTML for bots, zero changes to the existing codebase, and less load on your origin (fewer server cycles and database queries).
It covers both traditional SERPs (Google, Bing, Yahoo) and modern AI agents (ChatGPT, Grok, Perplexity), plus link-preview bots from messaging and social apps (iMessage, Slack, Telegram, WhatsApp, Facebook, X/Twitter). Because pages are served pre-rendered from a CDN, it also improves TTFB, LCP, INP, CLS, and other Web Vitals — and with it, Lighthouse and SEO scores. PWAs, SPAs, styled-components, AMP, and strict Content-Security-Policy setups are supported. The package is written in strict TypeScript and exports all necessary types.
Install it:
npm install seo-middleware-nextjs --saveThen create middleware.ts in /src/ or the root directory of your Next.js project:
// middleware.tsimport { SEOMiddleware } from 'seo-middleware-nextjs'const seoMiddleware = new SEOMiddleware({ // Get credentials from the ostr.io Pre-rendering Panel → Integration Guide auth: 'Basic xxxxxxxxxxxxxxxxxxxxxxxxxxxxxx',})export const middleware = seoMiddleware.createMiddleware()export const config = { matcher: '/((?!api|_next/static|_next/image|_next/webpack-hmr|\\.well-known|favicon.ico).*)',}The auth token can also be supplied via the OSTRIO_AUTH, PRERENDER_SERVICE_AUTH, or SPIDERABLE_SERVICE_AUTH environment variable instead of hardcoding it. The constructor accepts options for custom bot lists (botAgents), excluded routes (ignoredPaths), ignore get parameters (keepGetQuery), and static-asset extensions (ignoredExtensions). See full documentation in seo-middleware-nextjs repository.
To speed up snapshot capture, signal readiness from your client bundle: initialize window.IS_RENDERED = false early, then set it to true once the page has finished loading data. See implementation example here.
If the package fits your deployment, — you don't need hand-written middleware in Step 2 and the Nginx routing in Step 3 — skip ahead to WAF whitelisting (Step 4), cache TTL (Step 5), and validation (Steps 7–9). The manual patterns below remain useful when you need full control over bot routing or run a non-standard proxy topology.
Step 1: Identify Which Routes Need Prerendering
Not every route in a Next.js App Router application needs prerendering. Server Components, Static Pages (with generateStaticParams), and ISR pages are already crawler-friendly. Prerendering adds value for:
- Routes using
'use client'components with data fetching (useEffect, React Query, SWR) - Routes with significant client-side state that populates after mount
- Routes using Web Components or Shadow DOM content
- Any route where View Page Source shows significantly less content than the rendered DOM
Check each route category:
# Find all client component filesgrep -r "'use client'" ./app --include="*.tsx" -l# Check which routes use client-side data fetchinggrep -r "useEffect\|useSWR\|useQuery" ./app --include="*.tsx" -lRoutes that are purely Server Components with no client-side data fetching can skip prerendering. Routes with the patterns above need it.
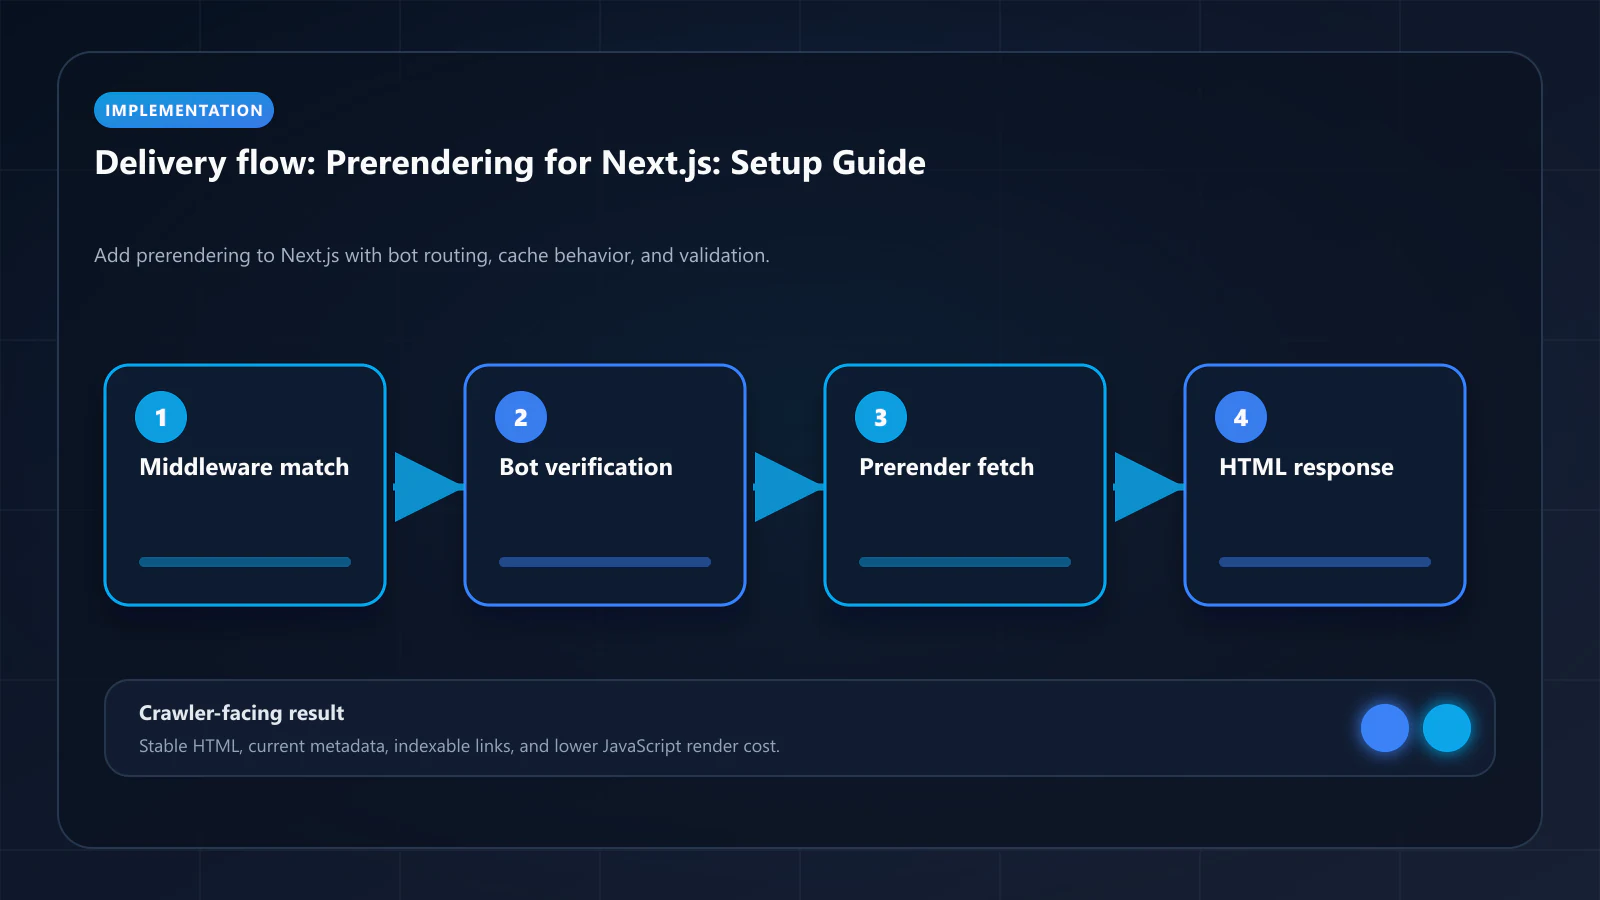
Step 2: Implement Bot Detection Middleware
Next.js middleware runs on every request at the Edge. The bot detection logic intercepts crawler requests and routes them to the prerendering service.
// middleware.tsimport { NextRequest, NextResponse } from 'next/server'const PRERENDERING_SERVICE_URL = process.env.PRERENDERING_SERVICE_URL ?? 'https://ostr.io'const PRERENDERING_TOKEN = process.env.PRERENDERING_API_TOKEN ?? ''// Bot User-Agent patterns — keep updated as new AI crawlers launchconst BOT_UA_REGEX = /googlebot|bingbot|yandexbot|duckduckbot|slurp|baiduspider|sogou|exabot|facebot|ia_archiver|gptbot|claudebot|applebot|anthropic-ai|perplexitybot|bytespider/i// Routes to exclude from prerenderingconst EXCLUDED_PATHS = [ /^\/_next\//, // Next.js internal assets /^\/api\//, // API routes /^\/static\//, // Static files /\.(js|css|png|jpg|jpeg|gif|svg|ico|woff|woff2|ttf|eot)$/i, // Assets]function isBot(userAgent: string): boolean { return BOT_UA_REGEX.test(userAgent)}function isExcluded(pathname: string): boolean { return EXCLUDED_PATHS.some((pattern) => pattern.test(pathname))}export function middleware(req: NextRequest) { const ua = req.headers.get('user-agent') ?? '' const { pathname } = req.nextUrl // Skip non-bot traffic and excluded paths if (!isBot(ua) || isExcluded(pathname)) { return NextResponse.next() } // Build the prerendering request URL const targetUrl = `${PRERENDERING_SERVICE_URL}/render/${req.url}` // Forward to prerendering service with auth header return NextResponse.rewrite(targetUrl, { headers: { 'X-Prerender-Token': PRERENDERING_TOKEN, 'X-Forwarded-For': req.headers.get('x-forwarded-for') ?? req.ip ?? '', }, })}export const config = { matcher: [ // Match all routes except Next.js internals and static assets '/((?!_next/static|_next/image|favicon.ico).*)', ],}Step 3: Configure Nginx Reverse Proxy (Alternative to Middleware)
If your deployment uses Nginx as a reverse proxy (common for non-Vercel deployments), configure bot routing at the Nginx layer:
# /etc/nginx/conf.d/prerendering.confmapmap $http_user_agent $is_bot { default 0; "~*googlebot" 1; "~*bingbot" 1; "~*yandexbot" 1; "~*gptbot" 1; "~*claudebot" 1; "~*applebot" 1; "~*anthropic-ai" 1; "~*perplexitybot" 1;}serverserver { listenlisten 443 ssl; server_nameserver_name yourdomain.com; locationlocation / { # Route bots to prerendering service ifif ($is_bot) { proxy_passproxy_pass https://ostr.io/render/$scheme://$host$request_uri; proxy_set_header X-Prerender-Token $PRERENDERING_TOKEN; proxy_set_header X-Forwarded-For $remote_addr; breakbreak; } # Route users to Next.js app proxy_passproxy_pass http://localhost:3000; proxy_set_header Host $host; proxy_set_header X-Real-IP $remote_addr; }}Step 4: Add ostr.io IP Ranges to WAF Whitelist
Before prerendering traffic can reach your origin, ostr.io's IP ranges must be allowed in your WAF.
Cloudflare:
- Go to Security → WAF → Tools → IP Access Rules
- Add each ostr.io IP range with action: Allow
- Note: Enter each CIDR block separately (Cloudflare does not support bulk import in the UI — use the API for large range lists)
# Cloudflare API bulk allowlistcurl -X POST "https://api.cloudflare.com/client/v4/zones/$ZONE_ID/firewall/access_rules/rules" \ -H "Authorization: Bearer $CF_API_TOKEN" \ -H "Content-Type: application/json" \ -d '{"mode":"whitelist","configuration":{"target":"ip_range","value":"<ostr.io CIDR>"},"notes":"ostr.io prerendering"}'AWS WAF:
# Terraform: AWS WAF IP set for ostr.ioresource "aws_wafv2_ip_set" "ostrio" { name = "ostr-io-prerendering" scope = "CLOUDFRONT" ip_address_version = "IPV4" addresses = [/* ostr.io IP ranges */]}resource "aws_wafv2_web_acl_rule" "allow_ostrio" { name = "AllowOstrio" priority = 1 action { allow {} } statement { ip_set_reference_statement { arn = aws_wafv2_ip_set.ostrio.arn } } visibility_config { cloudwatch_metrics_enabled = true metric_name = "AllowOstrio" sampled_requests_enabled = true }}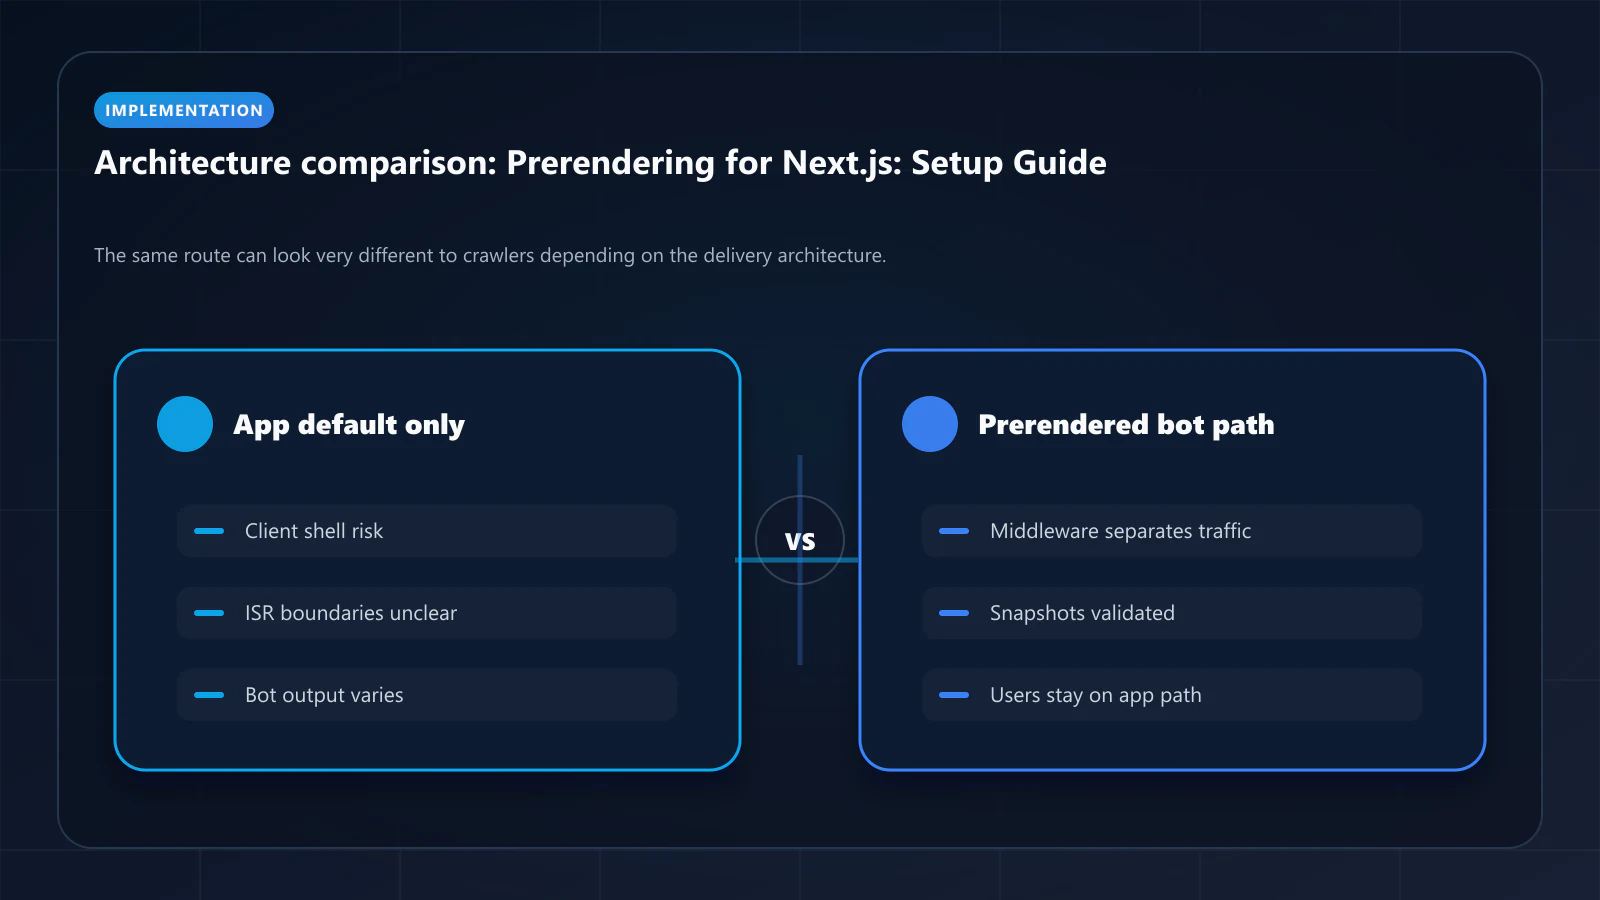
Step 5: Configure Cache TTL per Route Type
Different content types have different freshness requirements. Configure TTL per URL pattern in ostr.io's dashboard or via API:
// ostr.io TTL configuration via APIconst ttlConfig = { patterns: [ { match: '/blog/**', ttl: 3600 }, // Blog posts: 1 hour { match: '/product/**', ttl: 900 }, // Products: 15 min (pricing) { match: '/category/**', ttl: 1800 }, // Categories: 30 min { match: '/docs/**', ttl: 86400 }, // Docs: 24 hours { match: '/', ttl: 3600 }, // Homepage: 1 hour ]}Rule of thumb by content type:
- Prices, inventory, real-time data: 10–15 minutes
- Product pages, listing pages: 15–30 minutes
- Blog posts, static content: 1–4 hours
- Documentation, legal pages: 24 hours
Step 6: Set Up Cache Warming API Integration
Trigger snapshot warming on content publish events. For Next.js, the natural hook is after revalidatePath():
// lib/prerendering.tsexport async function warmSnapshot(url: string, priority: 'high' | 'normal' = 'normal') { if (!process.env.OSTRIO_API_KEY) return try { await fetch('https://ostr.io/api/cache-warm', { method: 'POST', headers: { Authorization: `Bearer ${process.env.OSTRIO_API_KEY}`, 'Content-Type': 'application/json', }, body: JSON.stringify({ url, priority }), }) } catch { // Non-critical — log but don't throw console.warn(`Cache warm failed for ${url}`) }}// In your CMS webhook handler or Server Actionimport { revalidatePath } from 'next/cache'import { warmSnapshot } from '@/lib/prerendering'export async function publishContent(slug: string) { const url = `https://yourdomain.com/blog/${slug}` // Revalidate ISR cache revalidatePath(`/blog/${slug}`) // Warm prerendering snapshot await warmSnapshot(url, 'high')}Step 7: Test the Prerendering Configuration
Before going live, verify that:
1. Bots receive prerendered HTML:
# Simulate Googlebot requestcurl -A "Googlebot" https://yourdomain.com/blog/your-post -I# Expected: X-Prerender-Status: hit or X-Prerender-Status: rendered header# If missing: middleware is not routing bot traffic correctly2. Users receive the live Next.js application:
# Simulate user request (no bot UA)curl https://yourdomain.com/blog/your-post -I# Expected: no prerender headers, normal Next.js response3. WAF is not blocking prerendering traffic: Check ostr.io dashboard for WAF-blocked render attempts. Check your WAF logs for blocked requests from ostr.io IP ranges.
4. DOM Consistency Score is above 95%: Use ostr.io's dashboard to compare the rendered snapshot for a representative product page against the live page. DOM Consistency Score should be 95%+.
5. Prerendering.info Checker: Submit your domain to the Prerender Checker and verify that the tool can retrieve a complete prerendered snapshot for your most important pages.
Step 8: Validate JSON-LD and Structured Data
Structured data (JSON-LD) must appear in the prerendered HTML, not be injected by client-side JavaScript. Verify with View Page Source (not DevTools, which shows the rendered DOM):
# Check JSON-LD in prerendered outputcurl -A "Googlebot" https://yourdomain.com/product/your-product | grep -o 'application/ld+json' | wc -l# Should return 1 or moreIf JSON-LD blocks are missing from the prerendered HTML, they are being generated client-side. Move them to Server Components.
Step 9: Monitor with Google Search Console
After going live, monitor these signals in Google Search Console:
- Crawl Stats → Render type: Should shift from "JavaScript" to "HTML" rendering
- Coverage → Not indexed: Should decrease over 4–8 weeks as snapshots reach Googlebot
- URL Inspection: For any page still not indexed, use URL Inspection to fetch and render — verify the prerendered output is complete
Frequently Asked Questions
Yes. Next.js middleware runs on Vercel's Edge Runtime by default. The `NextResponse.rewrite()` call routes bot requests to ostr.io at the edge, before reaching the Next.js application origin. This is the recommended Vercel deployment pattern — it adds zero latency for user traffic.
Exclude authenticated routes from prerendering. If the prerendering service attempts to render a page behind authentication, it receives a login redirect — not the page content. In your middleware, add authenticated route paths to the `EXCLUDED_PATHS` array.
No. Server Components are rendered server-side by Next.js for all requests. For Server Component pages, prerendering adds a caching layer on top of the server-rendered output — the output should be identical. The primary value of prerendering for App Router sites is for pages with Client Components that fetch data after mount.
Run the ostr.io service locally or use the hosted service with a tunnel (ngrok, Cloudflare Tunnel) to expose your local Next.js server. Test using `curl -A "Googlebot" https://your-tunnel-url/your-page`. The prerendering pre-launch checklist covers the full local testing workflow. !Raster matrix diagram of operational levers, risks, and validation checks for Prerendering Implementation Guide for Next.js: Setup, Routing, and Validation.
Editorial trust
Written by prerender Editorial · Engineering Team. We build and run pre-rendering infrastructure for more than 200 engineering teams, which is where the numbers and code samples on this page come from.
Last updated . Editorial scope and review policy: About prerender.info.